How to schedule and manage WarRoom meetings.
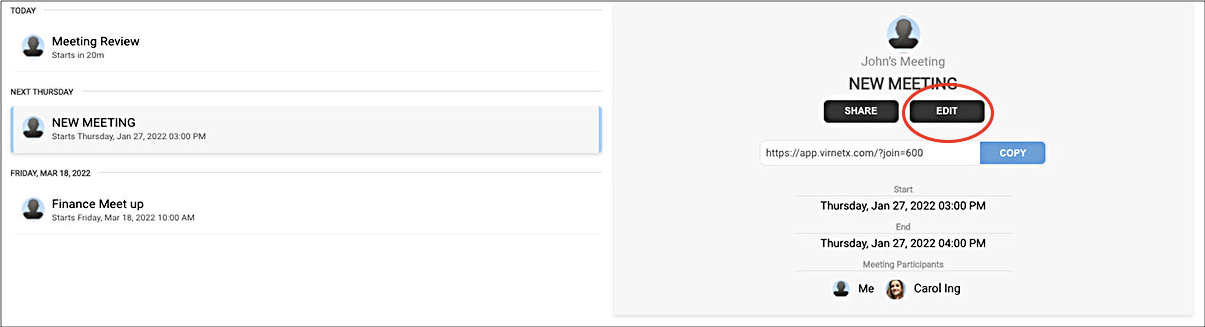
On the button panel on the left side of the screen click the MEETINGS button.
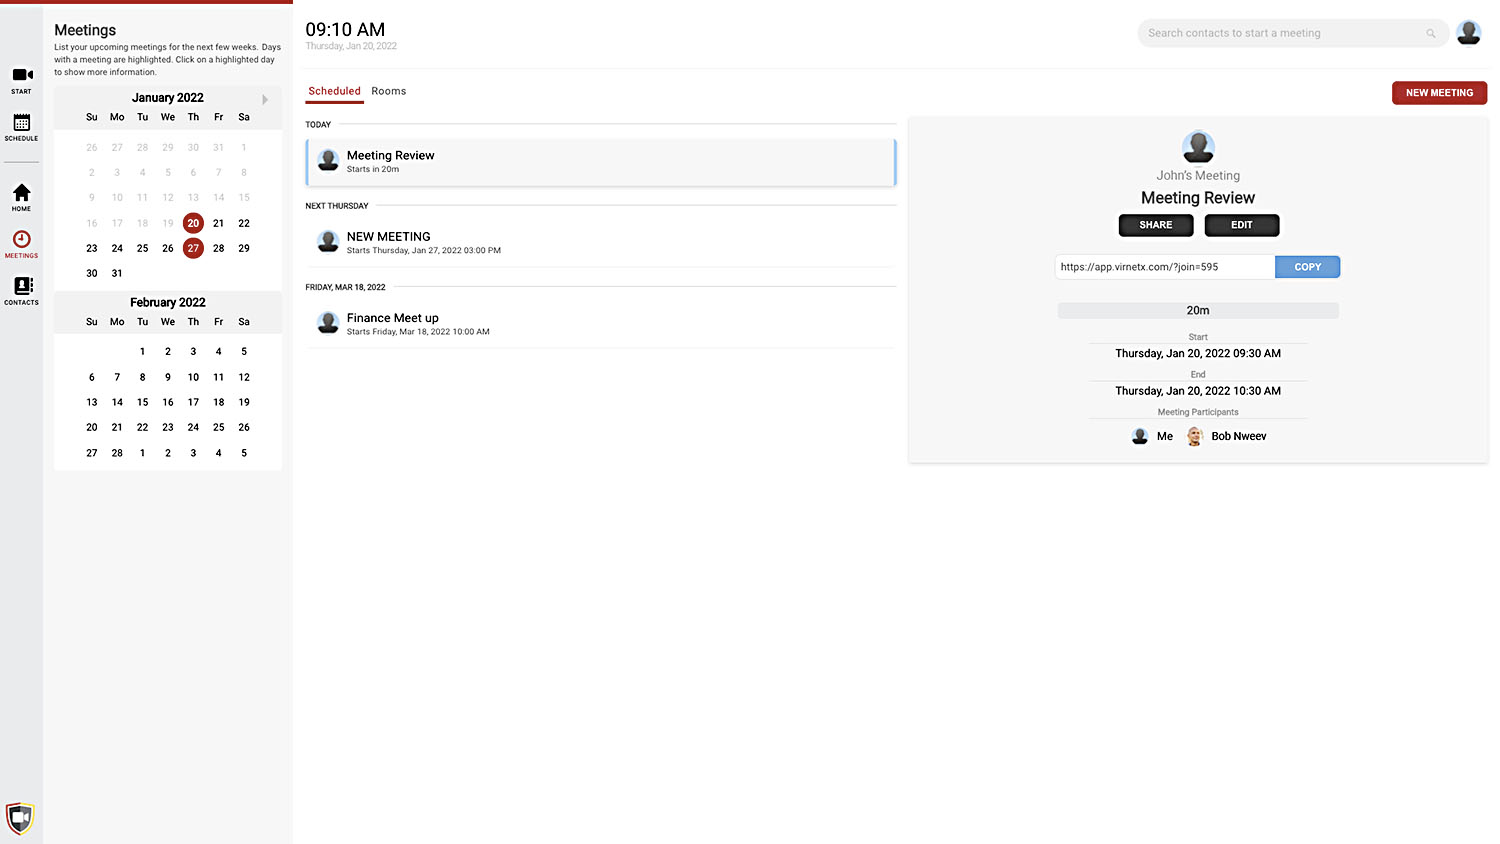
Note: Any meetings shown will depend on what meetings are currently either active or upcoming in the meetings section based on the current calendar.
Viewing meetings and options:
Click once on a meeting to see current status and options available.
Note: The options available for the selected meeting is determined by timing.
SHARE and EDIT are the only available options based on how soon this meeting starts.

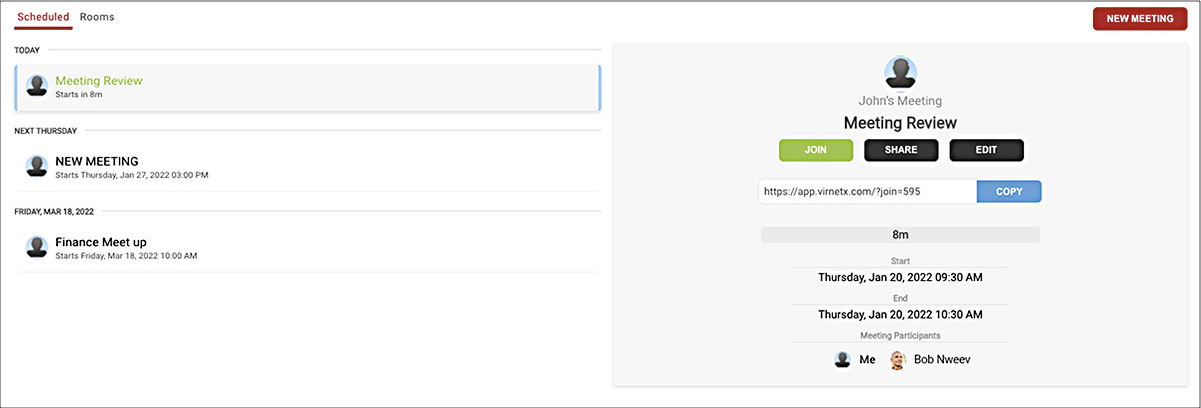
When the meeting falls within a 10 minute window the JOIN option becomes available.
Clicking the JOIN button will automatically navigate to the ACTIVE screen and into the meeting.
Clicking the SHARE button will launch the MEETING INVITATION Window with the following options.
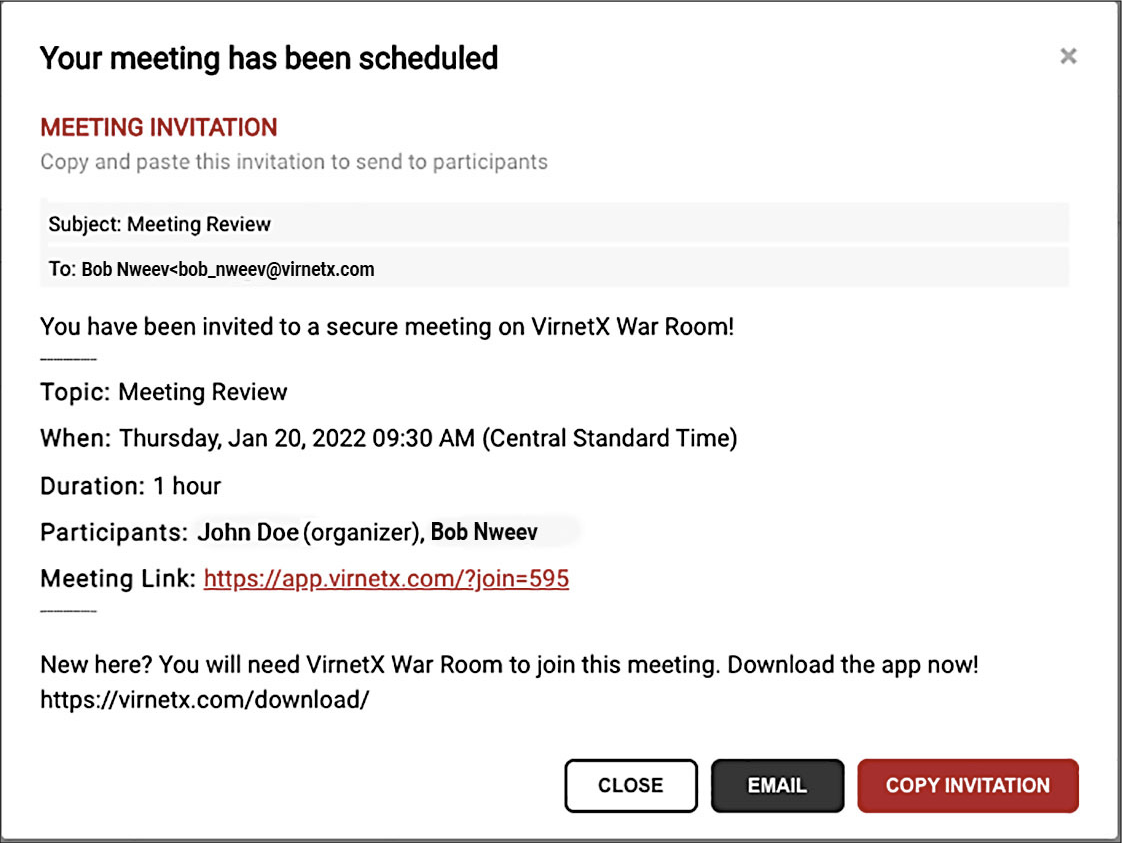
- CLOSE - Closes the MEETING INVITATION Window.
- EMAIL - Launches an email (in your current email software) with the link to the meeting included and to the participants already added to the meeting.
Note: Contacts can be added in the email message but adding them prior to clicking the SHARE button will add their email information directly to this message. - COPY INVITATION - Copies the meeting information to the clipboard for later use.
Note: This information will remain on the clipboard until pasted or replaced by the next copied information.
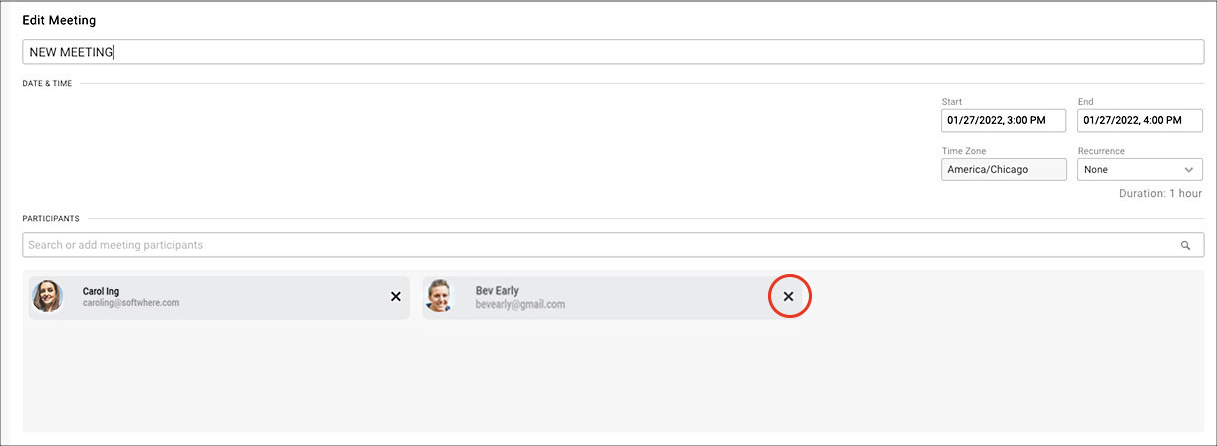
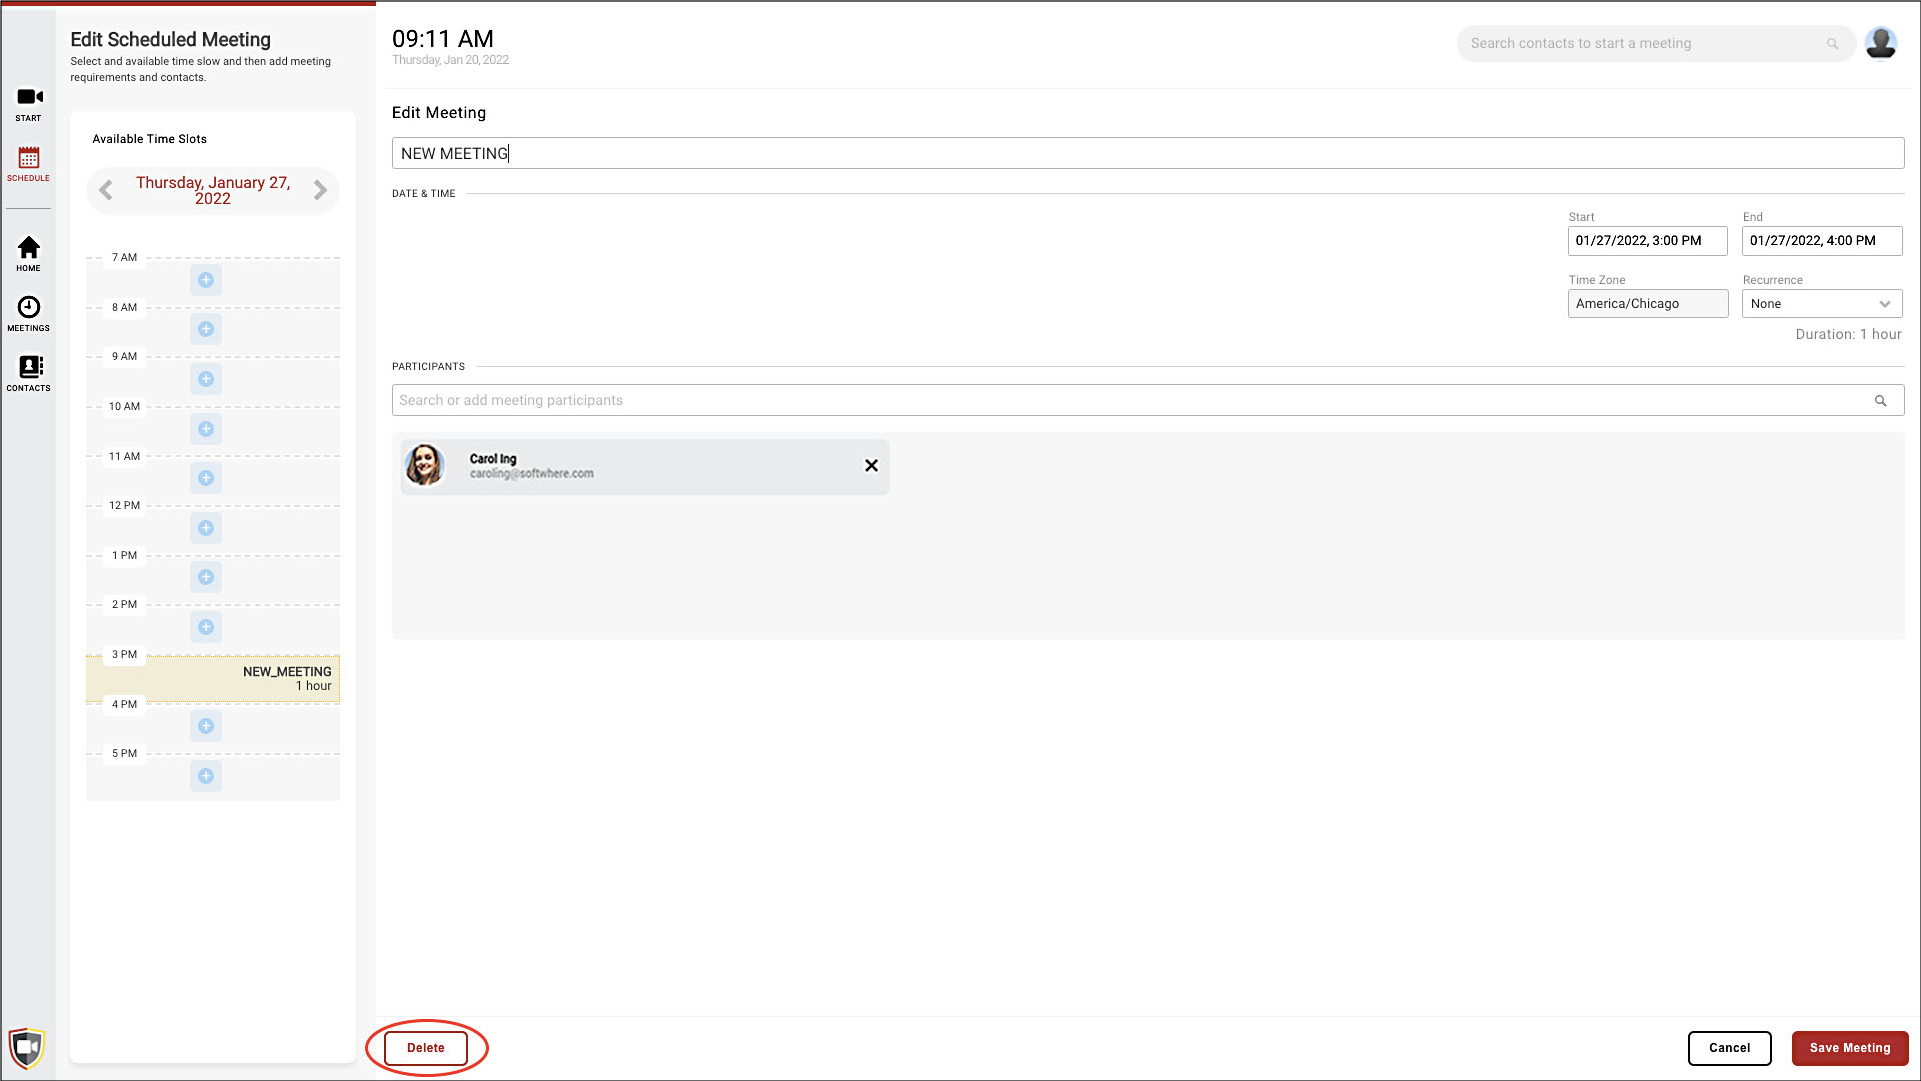
Clicking the EDIT button on any meeting will navigate to the SCHEDULE screen where you can add Participants from current CONTACTS.
Contacts that are current participants of this meeting can also be removed from here as well by clicking the X to the right of the Contact shown, however there must be at least one participant in the meeting to continue.
By clicking the Delete button the entire meeting can be removed from the calendar.
Creating, viewing, and managing Rooms:
In the MEETINGS screen click the Rooms text near the left side of the screen.

In this area a Room can be created as an open, unlimited timed meeting spot for you and as many participants as needed.
Creating a Room:
- Click the NEW ROOM button.
- Click in the Topic text box and type a name for the Room.
This could be anything but using a project name might help your participants relate to the topic of discussion planned for this Room. - Add Contacts as participants to this room. A good rule of thumb is to add all the contacts that you think will be needed so they always have access to the room when they are available.
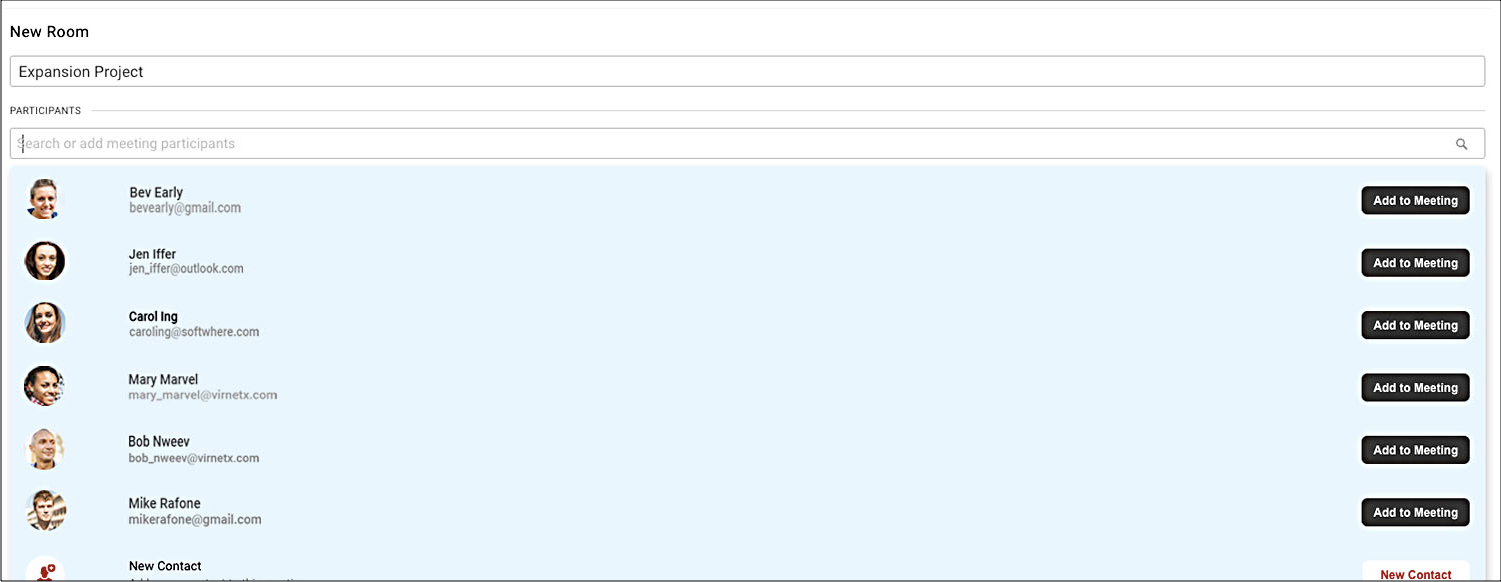
Note: More contacts can be added as needed. - Click the Create Room button in the bottom right of the screen.
Viewing and managing a Room:
In the Rooms view of the MEETINGS screen the options available are similar to most meetings. 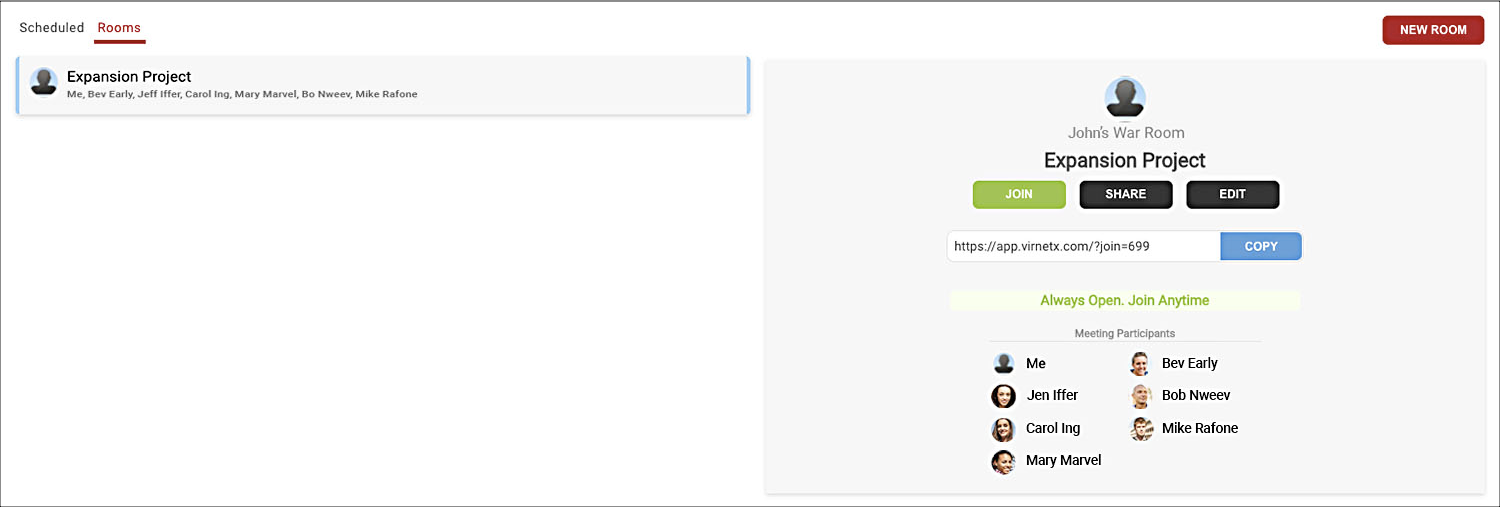
- JOIN - When clicked will activate the meeting and navigate the user to the ACTIVE screen.
Note: Under Summary MEETING ENDED will indicate that the timing on this meeting is unlimited. - SHARE - When clicked will launch the MEETING INVITATION Window.
This is the same window for a standard meeting with the same options available.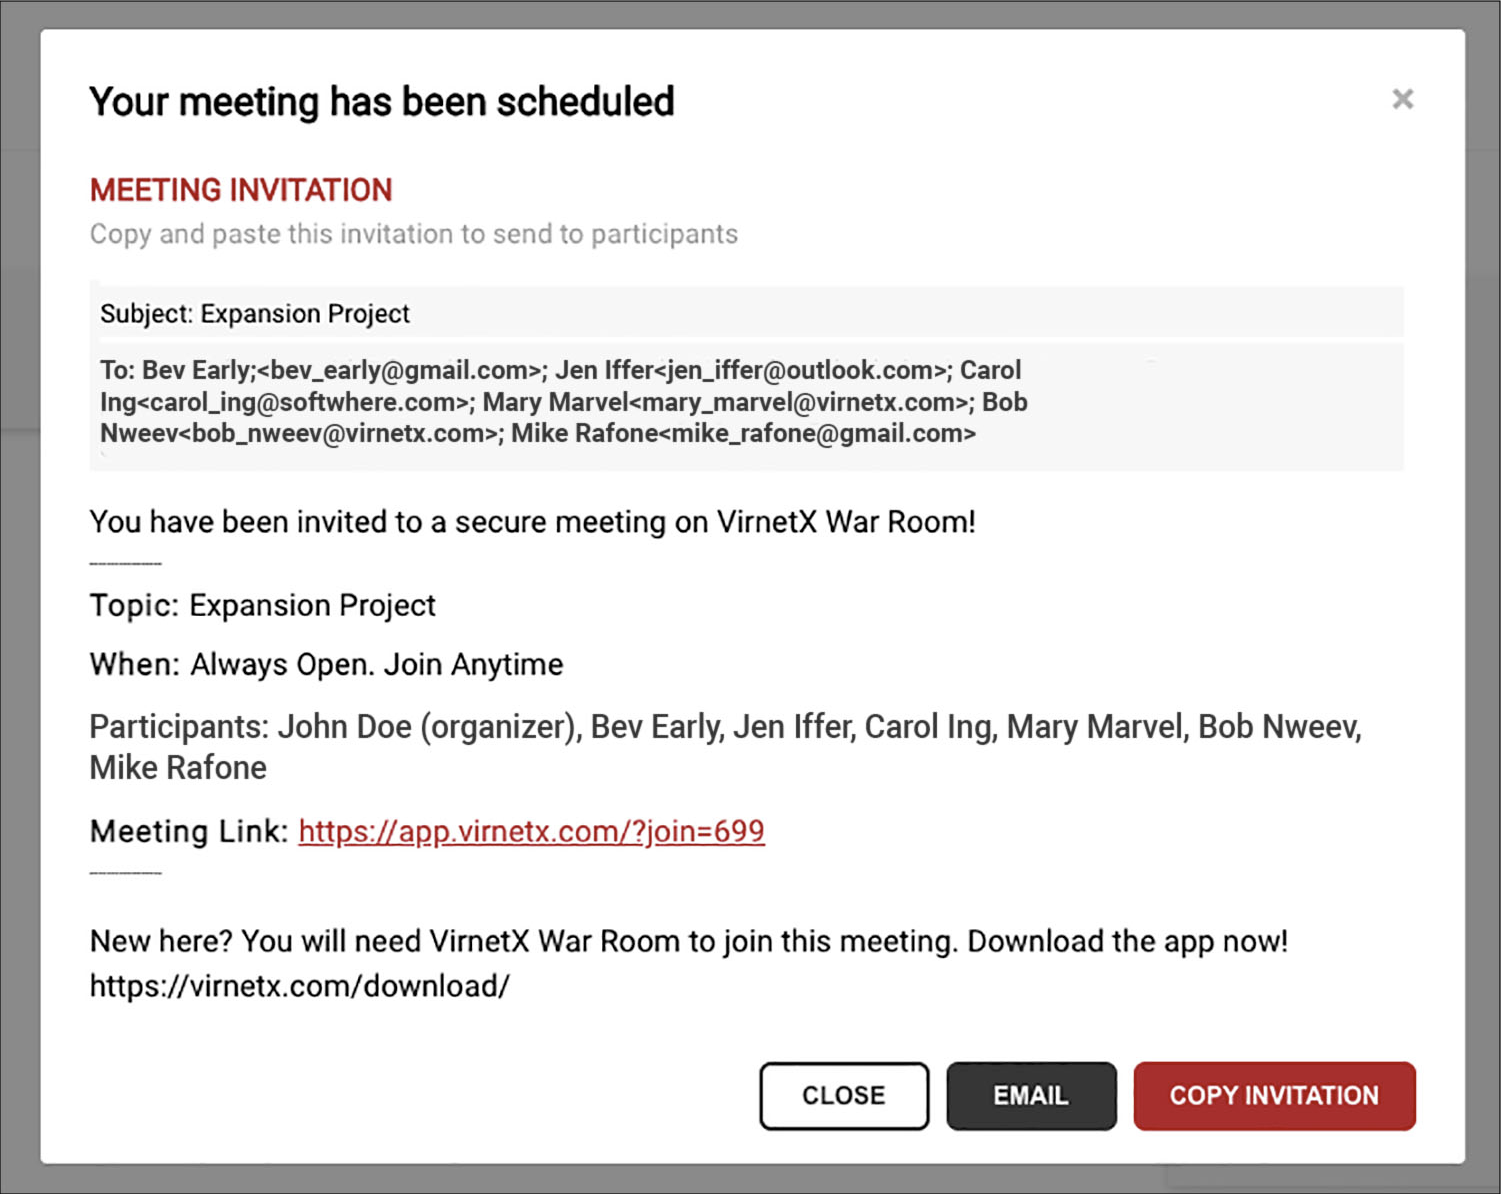
Note: The amount of participants sent an EMAIL will be based on the Contacts added to the Room. - EDIT - When clicked operates the same as in the Meetings window. Contacts can be added or removed to the Room but like a meeting there must be at least one participant added to a Room at all times.
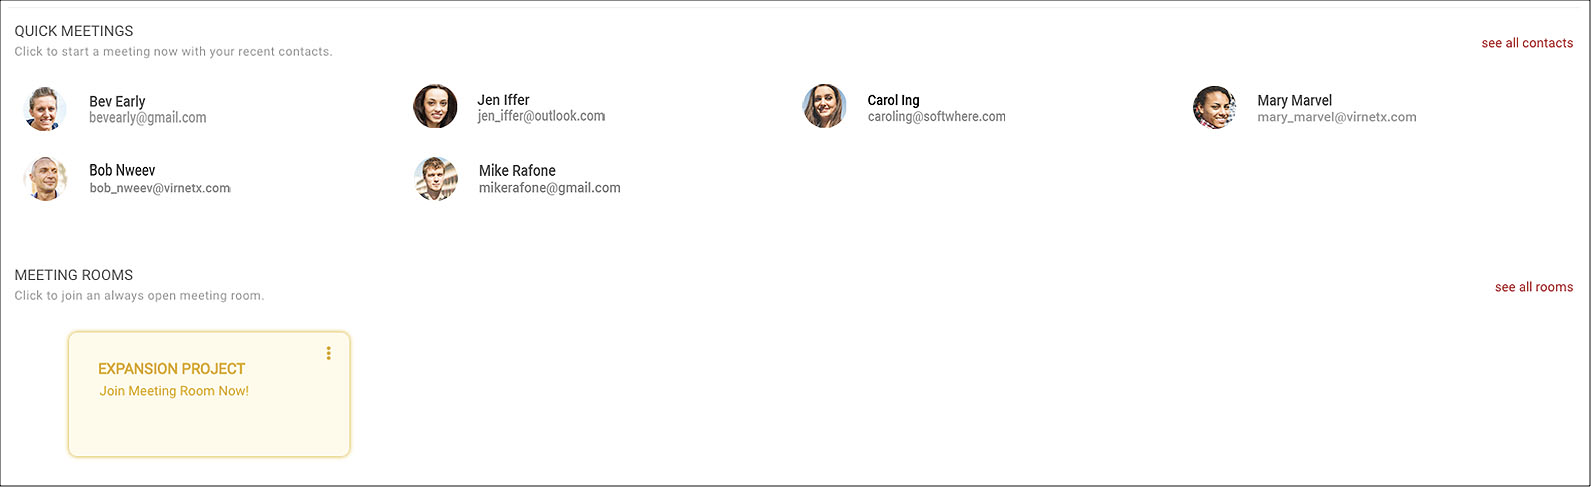
Available Rooms can be viewed from the HOME screen as well.

A Room can be entered from the HOME screen by clicking the Room button.