
Create a modern and secure user experience by seamlessly connecting users to private applications regardless of their device, location or network without impacting the application experience. Easily manage access for your users, gain visibility and control granular access to applications, services and system roles.
Active Users List

Search & Filtering for Users
You can quickly search and find users by leveraging the user search capabilities. In the search field, you can search by partial or full firstname, lastname or email. The matching user results will automatically be shown once your search query is entered. The matching search terms will be highlighted in yellow in the list of users. Users can be sorted alphabetically by name or email address by clicking on the Name and Email column headers. By default, users are listed alphabetically based on firstname.
 Create New Users
Create Single New User
For the Users page, click the New Users button and then select Create New User from the menu.

Now enter the full name, email and role of the new user you would like to create. The default role is a General user or you can select one of the other roles. Click the Add User button to create the user.

Newly created users will be able to do the following:
- Activate new device(s) from the VirnetX One Mobile or Desktop Client
- Administrative roles will have access to the VirnetX One Admin Console
New users will need to be given access to any applications that are secured by VirnetX Matrix.
Create Multiple New Users
IT administrators need the capability to bulk import multiple employees, contractors, and partners and then assign them access to applications and services.
With the bulk user import feature, IT administrators can import up to 10,000 users at once. They can then easily assign all or subsets of users to War Room or individual applications secured by VirnetX Matrix.
Start the import process from the Users page. Click the New Users button and then select Import Users from the menu.

Administrators can create multiple new users using either a CSV file or a list of email addresses.
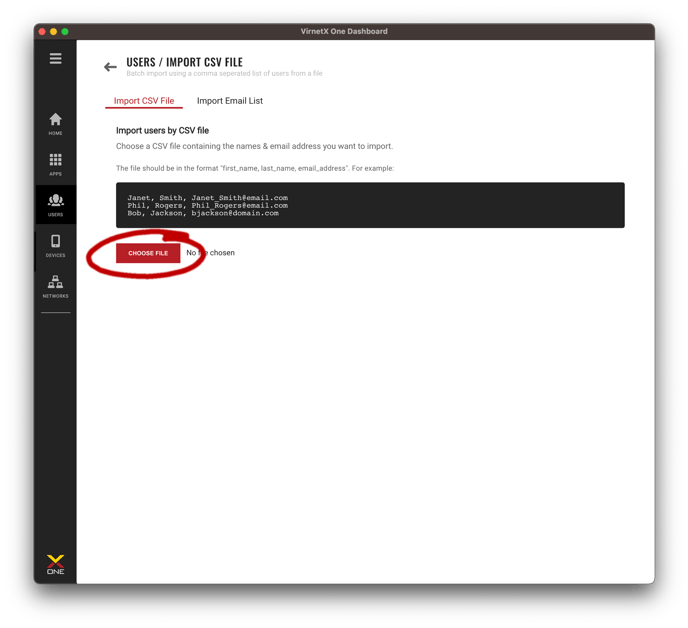
Create Multiple New Users from CSV File
The Import CSV File tab is selected as the default bulk import option. You will then be prompted to upload a Comma Separated Variable or CSV file containing the names and emails of the new users you want to import. Each new user will be listed per line in the following format:
Firstname, Lastname, email
For example, the file new_users.csv could have the following contents of two new users, Janet and Phil:
Janet, Smith, janet_smith@email.com
Phil, Rodgers, phil_rodgers@email.com
Software tools from Microsoft, Google and others allow you to export user information to a CSV easily. You can also create this file using a spreadsheet or a text editor.
Here are some links to help you get started:
Once you have the CSV file with your list of new users, click the Choose File button and select the CSV file you created.
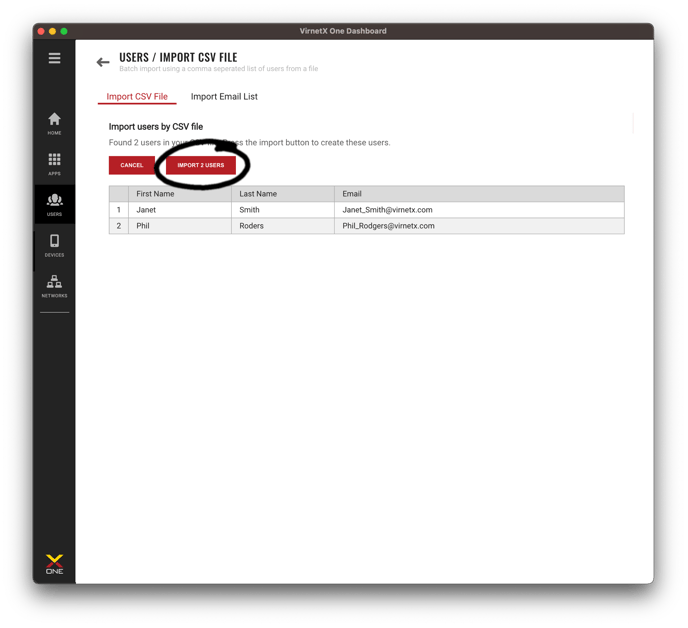
 Your file will be processed and the list the new users you want to add will be displayed for confirmation. If there were any issues with the file, those will be displayed so you can make any corrections. Review the users and their information. If all the information looks correct then click the Import Users button to add the new users. All users will be imported with the General User role.
 Create Multiple New Users by Email List
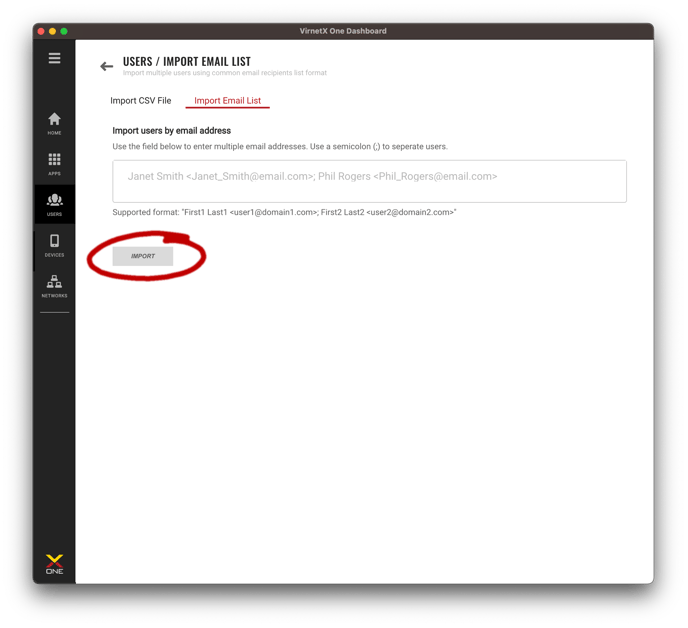
Select the Import Email List tab to import new users in the following format:
Firstname Lastname <email>
This allows you to easily copy users from an email or export users from other software in this format. The following example shows how to import multiple users by separating each user with a semicolon.
Janet Smith <janet_smith@email.com>; Phil Rodgers <phil_rodgers@email.com>
Type or copy the list of users into the field on the import page and then click the Import button.
Your email list will be processed and the list the new users you want to add will be displayed for confirmation. If there were any issues with the list, those will be displayed so you can make any corrections. Review the users and their information. If all the information looks correct then click the Import Users button to add the new users. All users will be imported with the General User role.
User Details, Network Access and Device Insights
From the Users List, clicking on a specific user name will take you to the additional insights about the user including user details, networks where the user has access and registered devices. 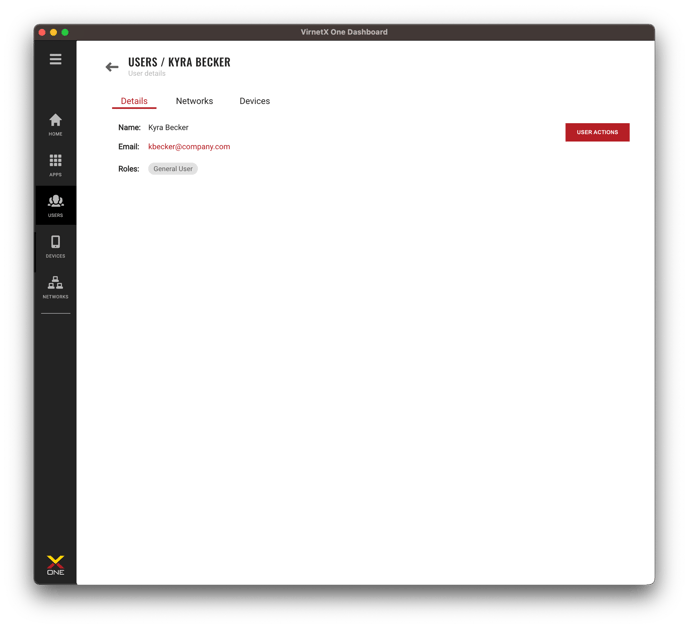
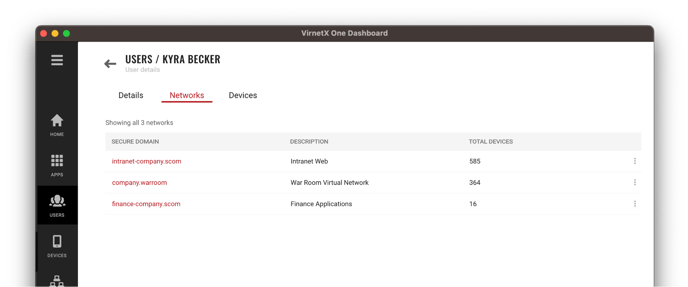
Network Access
The Networks tab on the users details page, tells which Secure Domain networks the user has access. This provides a quick visual of the networks and applications and how many devices that are granted access.
Registered Devices for the User
The Devices tab shows all the authenticated and registered devices associated with the user along with some basic information about the device. Administrators get more detailed information by clicking on the device or take action to block or delete the device. 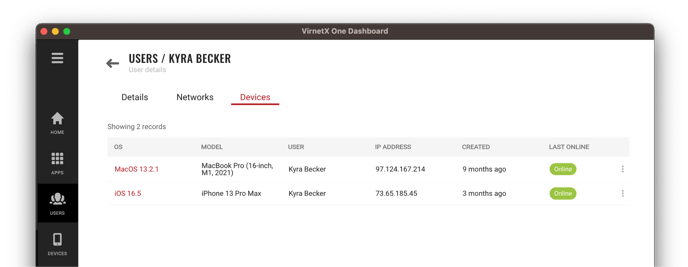
Modifying User Information
Administrators have the ability to edit the a user's name or role. From the users list, click on the three-dot menu to the right of the user you want to modify. Then select Edit User from the menu.

From the Edit User dialog, you can change the name or select a different Role from the drop-down. Click Save to finalize your changes.
 Unfortunately, the user's email cannot be modified once the user has been created. If an email needs to be changed, you will need to remove the user and create a new user with the correct email.
Managing Roles
You can easily select a role when a user is created or modify an existing user’s role at any time.
When creating individual users, select the appropriate role from the Role dropdown in the create new user dialog. You can modify an existing user’s role by selecting a user and then choosing Edit User. Next choose the new role from the Role drop-down.
Here are the supported roles:
|
Role |
Description |
|
Owner |
System will assign this role when the organization is created. Owner has complete management of the platform through the Admin Console. |
|
Administrator |
Complete management of the platform through the Admin Console including inviting and revoking user access, creating, and managing application permissions and blocking device access. |
|
Analyst |
View only access to users, devices and networks on the Admin Console. |
|
Support |
View only access to users, devices, applications, and networks on the Admin Console. Ability to block device access. |
|
General User |
Ability to access the client, register their individual device and access organization applications they are granted permission. Default user permission. |
Delete a User
From the Users List, use the search to find the user you want to delete by searching for their name or email address. Next, click on the three-dot menu, and select Delete. Confirm that you want to permanently delete the user in dialog and then click the Delete button. The user will be deleted and all associated devices will have their application access revoked. The user will not be able to activate any new devices.
